A Print and Make Paper Building System!
What is it?
How to Make Parts
 |
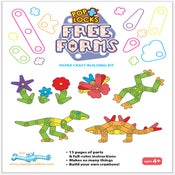
| Free Forms Parts |
1. Cut out all shapes around the black lines. A ruler and a craft knife can help make long, straight-line cuts.
2. Remove circles with a 5/8" circle punch or carefully cut them out with a craft knife.
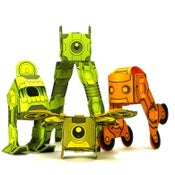
The more parts you make, the more you can build. Animals, robots, vehicles, real flying toys, and more!
How to Build
Poplocks connect pieces together! Line up two or more holes, fold and hold the Poplock then insert "feet-first" into the hole and PRESS to Pop and Lock!
Any single Poplock connection can ROTATE, so you can easily create pose-able paper toys with arms, legs, tails, ears, and more!
STACK two or more Poplocks, they will form a tighter connection. 4 Poplocks will LOCK two Free Forms parts together so tightly, they will not rotate!
- More than 4 stacked Poplocks are hard to insert!
- You may have trouble connecting 5 or more stacked Free Forms parts with any number of Poplocks.


3 comments:
Yo tengo un molino de viento
en su idioma actual es
I have a windmill
WOW THIS IS A GENIUS IDEA SINCE E=mc2.
this TOTALLY ERADICATES the use of Paper Brads, i experimented with making the pop-locks stiff with the right amount of layers/ - or - "Precisely" dousing it with superglue ( taking care not to touch another moving part - And the finished model look much more elegant than the UNSIGHTLY paper brads, well - I used this pop-lock system to make Articulating Paper Dolls like the Jumping Jack Types where the limbs are activated by tugging on a String, i will comment again and also post Images of my work when its fully finished.
I love this System !!!!!!!!!!!!!!!!!!!!!!!!!!!!!!!!
A Big Thank You to the originator of this system, and also thanks for sharing it with us, common folks.
Post a Comment